
I spent a little more time on these pair of Flaming Deer Antler Tampers, especially in carving the flames with a dremel tool. The first tamper I decided to create a natural antler base that was sanded down with a grinder then with 1000 grit sandpaper and finally buffed with carnuba wax. The dremel tool was used for carving the flames and the divots/rustication. I handpainted it with Testor paint and then applied a coat or two of polyurethane. This tamper measures 6" tall & 11/16" at the base.
The second tamper has the same flames carved into the antler but I went with a smooth look vice rustication. I used a file to create the groove separating the foot from the flames, then sanded it down with the grinder and eventually 1000 grit sandpaper. I originally tried to color it with red and black dyes but that didn't pan out; didn't absorb the colors as I expected. Plan B was to handpaint it as I did with the first tamper then apply polyurethane. This one is just shy of 6" tall with a 5/8" base for the foot and 3/4" at the base of the flames.
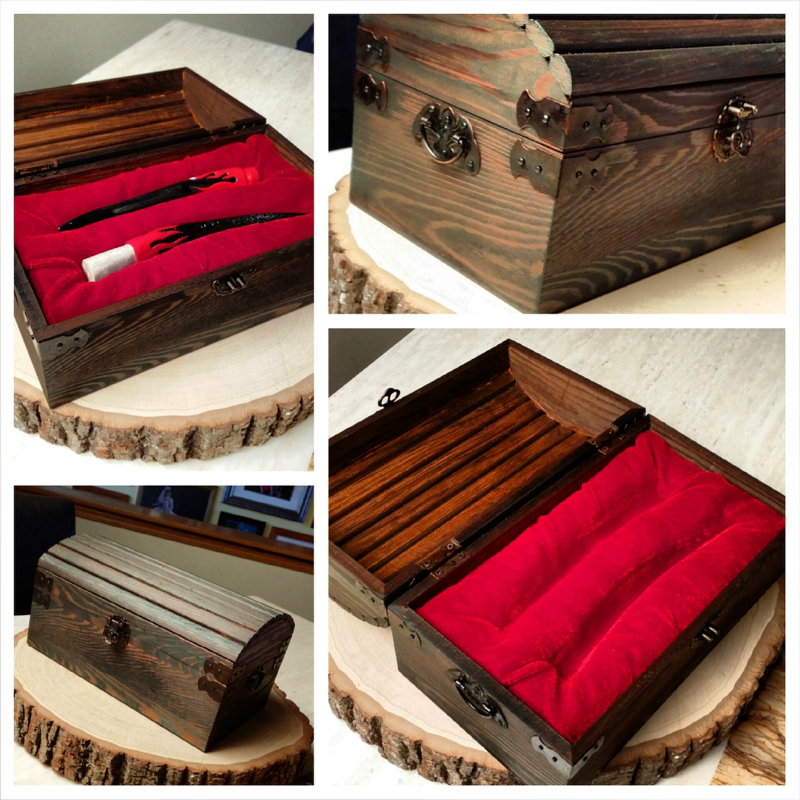
Both tampers turned out better than expected and look cool sitting in the chamber of my pipes :) They look almost too purrty to use so I decided to use Olie Sylvester's (olieps3 on IG) idea of creating a case to store these tampers. I went to Michaels and found this little treasure chest which needed to be sanded and stained. I also picked up some foam core so that I could carve out a bed and glue some red felt material before placing it in the chest. Now these Flaming Deer Antler Tampers have a bed! Not a bad way of showcasing some homemade tampers eh?
 RSS Feed
